I know you have all been waiting patiently for part two of this series. I’d like less time to go by in between these multi part blogs but sometimes life just gets in the way. In part one of this series, I showed you how to get started with Insomnia and how to get your ‘bearer token’. Now that we have these two boxes checked, we can begin to query the Azure Management API to get information about our Azure NetApp Files resources.
First, I’ll show you how to create a basic query to get a list of your NetApp Storage Accounts. For more information about the Azure NetApp Files storage heirarchy, head on over to docs.microsoft.com. Once we have a successful response to our basic query, we’ll create a more specific request and get some useful information about one of our Azure NetApp Files Volumes. Lastly, I’ll show you how to use cURL to query the API from the Linux command line. This can be really useful if you would like to integrate API calls into scripts or other automation tools.
Let’s get started.
Get a List of NetApp Accounts 🔗
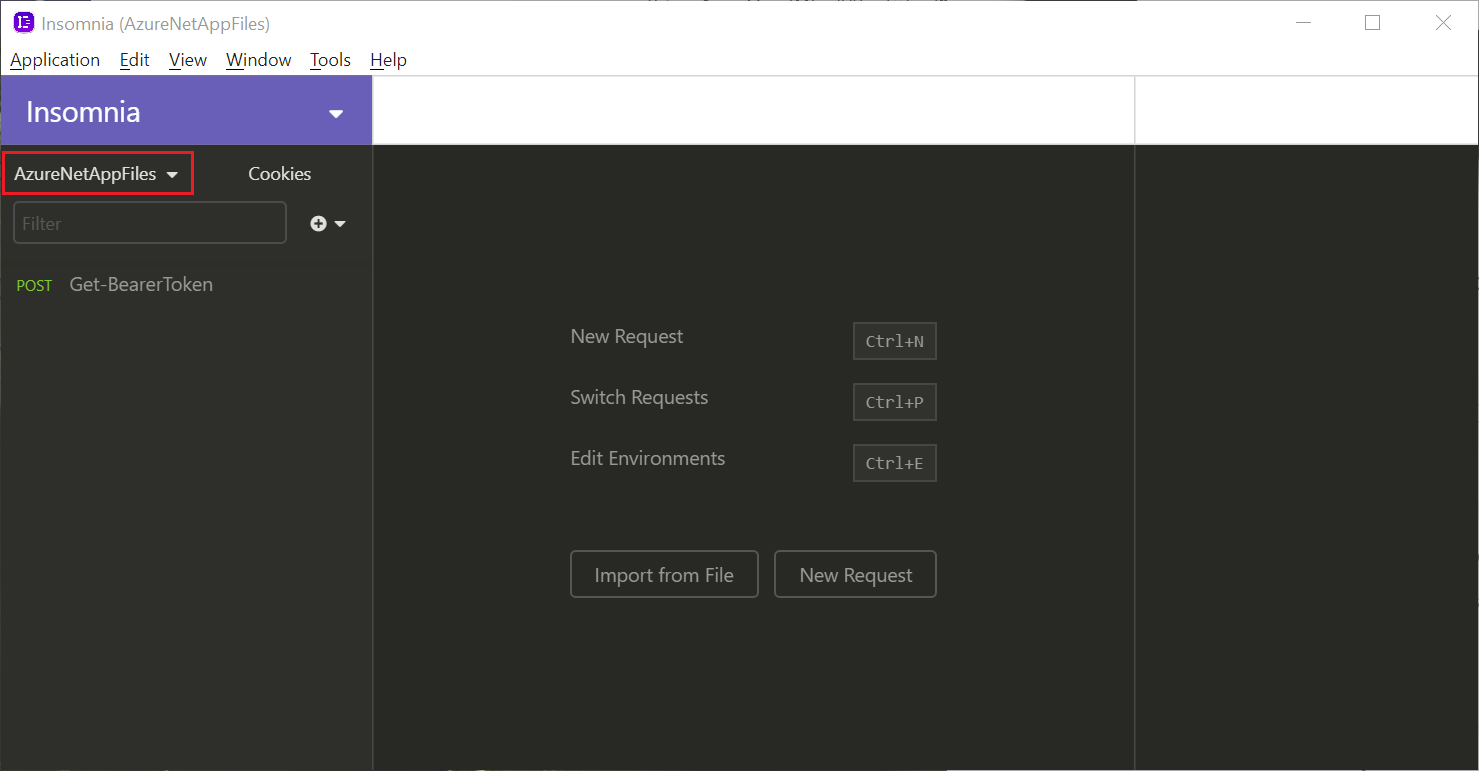
Open Insomnia and if needed, switch to your ‘AzureNetAppFiles’ environment. It should look something like this:
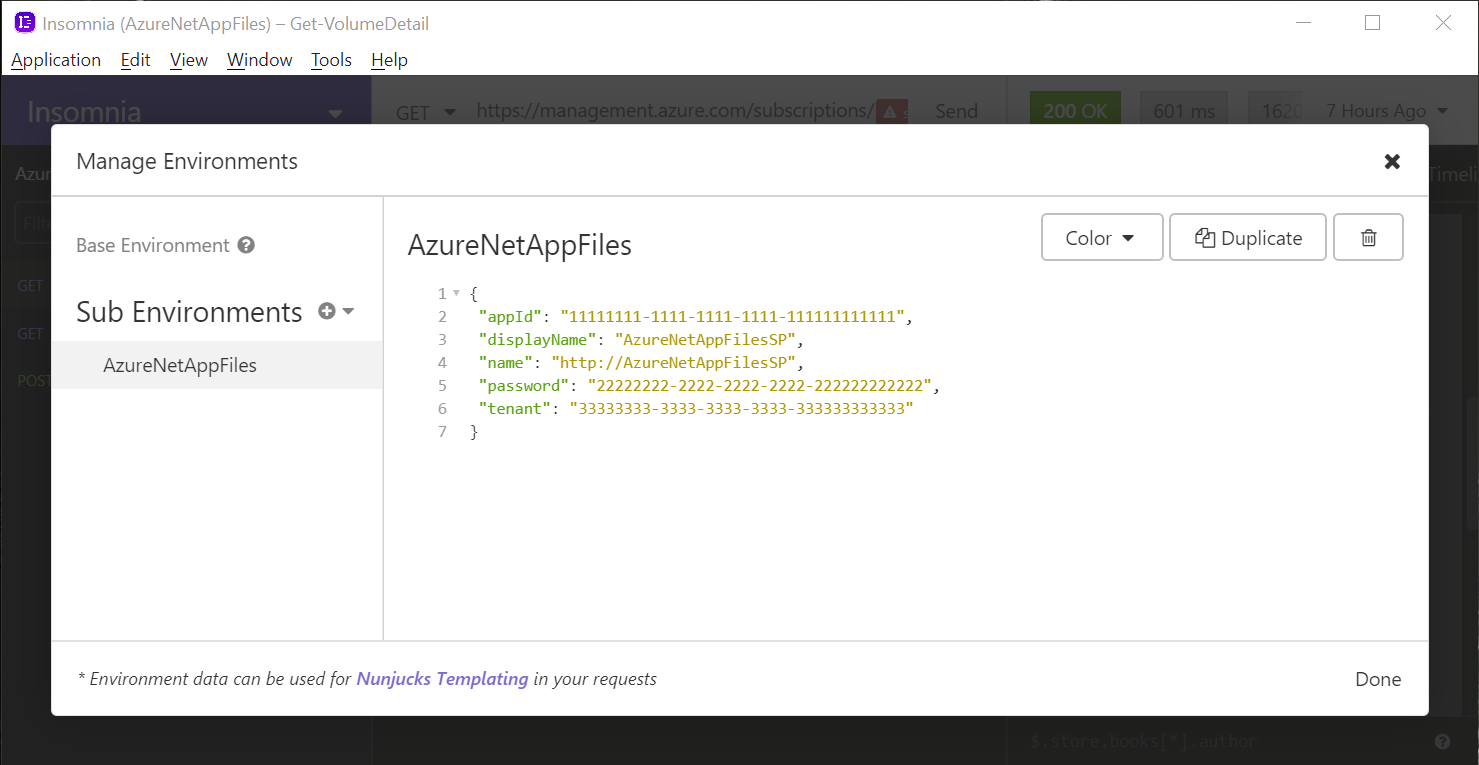
Before we create our query, we’ll need to add two variables to our environment definition. One for your Azure Subscription ID and another for the resource group that contains your Azure NetApp Files resources. Click the dropdown labeled ‘AzureNetAppFiles’, click ‘Manage Environments’. It should look something like this:
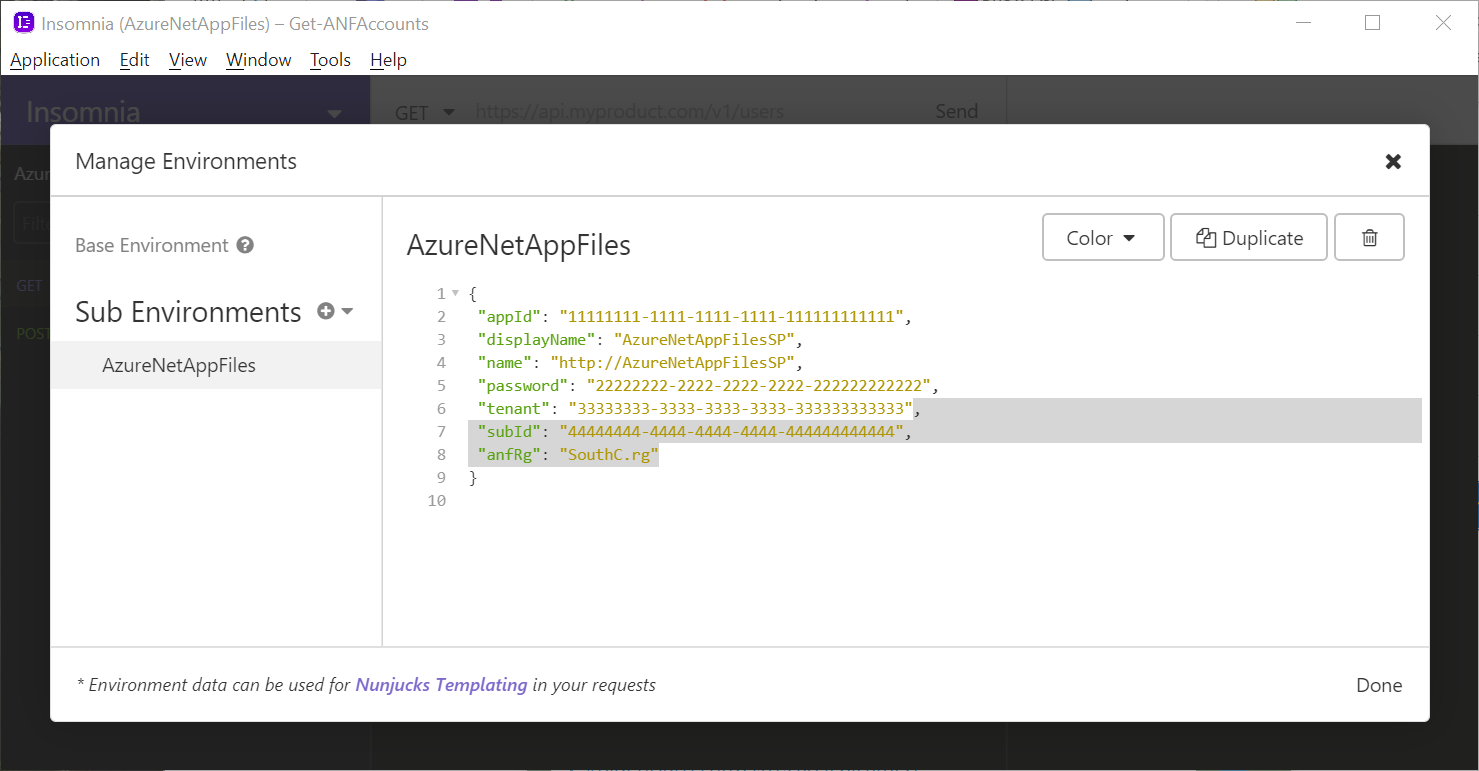
Add a comma to the very end of the line preceding your closing curly bracket ‘}’ followed by two additional lines defining your ‘subId’ and ‘anfRg’ variables. Sample code below to cut and paste in to your JSON code block:
,
 "subId": "44444444-4444-4444-4444-444444444444",
 "anfRg": "SouthC.rg"
Your JSON syntax is critical. Make sure your double quotes, commas, and curly braces are in order. The final result should look something like this: (I’ve highlighted the new comma and additional lines.)
Click the ‘Done’ button within the ‘Manage Environments’ window to save your new variables. Now we are ready to create our new request.
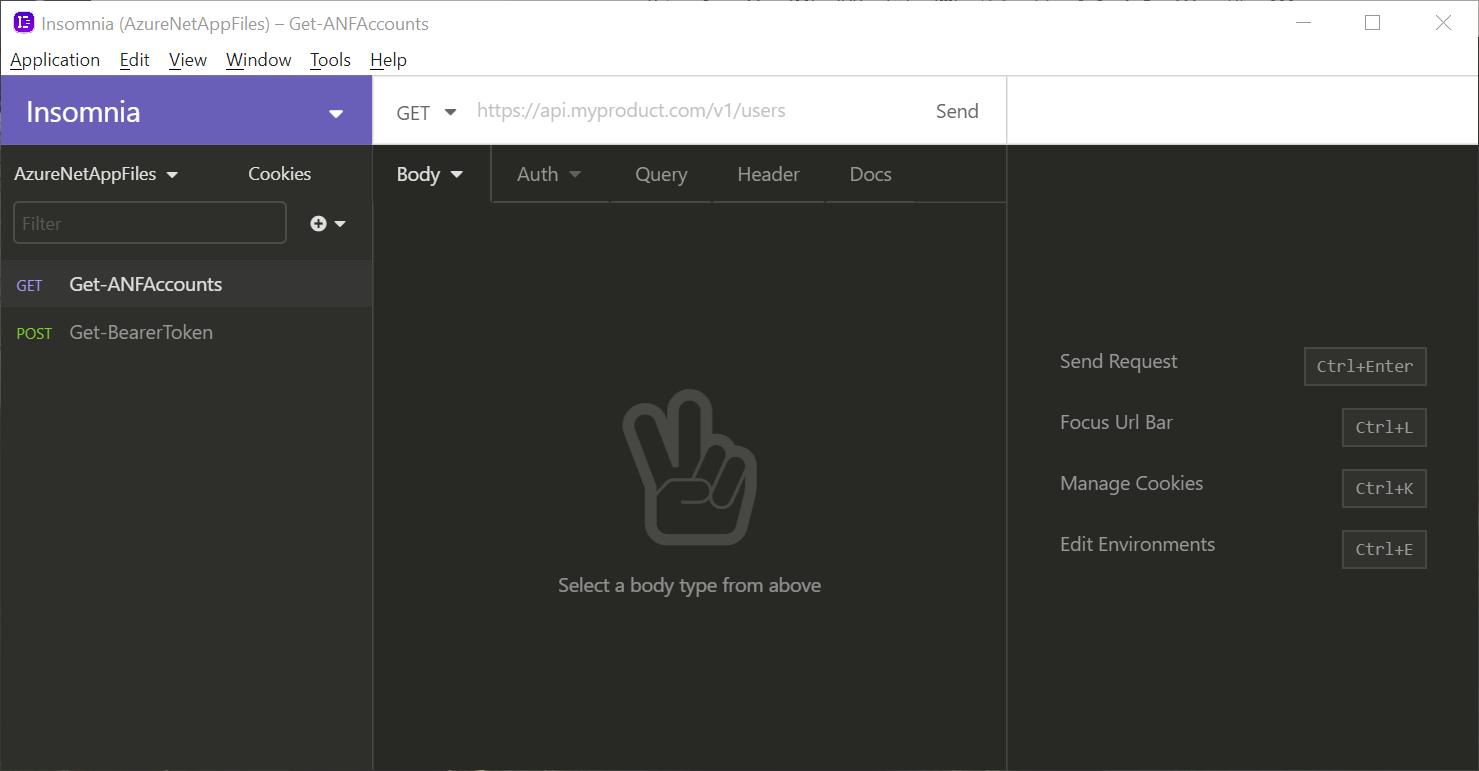
Click on the ‘New Request’ button or choose ‘New Request’ from the ‘+’ drop down menu. Give your request the name ‘Get-ANFAccounts’. As you create more requests, having meaningful names will make it much easier to quickly find the request you are looking for. I like the ‘Verb-Object’ notiation that PowerShell uses, but you can use a naming scheme that works for you. Ok, now choose ‘GET’ as the method and click the ‘Create’ button. It should look like this:
Paste the following in to the ‘URL’ field just to the right of the word ‘GET’:
https://management.azure.com/subscriptions/{{subId}}/resourceGroups/{{anfRg}}/providers/Microsoft.NetApp/netAppAccounts?api-version=2020-06-01
Notice that the variables defined by double curly braces ‘{{}}’ resolve to purple boxes indicating they are a valid variable defined by your environment. Hovering over these purple boxes will reveal the resolved value.
Finally, we’ll need to authenticate this request using our bearer token. If you aren’t sure what a bearer token is or how to get one, go back to part one of this series to learn all about it. As mentioned in part one, bearer tokens do have a shelf life. For this reason, let’s make a new request and get a fresh token. Click on ‘Get-BearerToken’ and then click the send button. You should see a ‘200 OK’ response in the top right corner and your new bearer token will be displayed in the preview pane. Copy the bearer token without the leading and trailing double quotes to your clipboard.
Now that you have a fresh bearer token, go back to your ‘Get-ANFAccounts’ request and click on the ‘Auth’ tab. Click the tab again and select ‘Bearer Token’. Finally, paste your entire bearer token in to the ‘TOKEN’ field. We can automate this token refresh process, but we’ll save that for another post.
We are now ready to send our API request. Click the ‘Send’ button. You should get a ‘200 OK’ response and a JSON array of your Azure NetApp Accounts and thier various properties.
Here is an example of the response from my environment:
{
  "value": [
    {
      "id": "/subscriptions/44444444-4444-4444-4444-444444444444/resourceGroups/SouthC.rg/providers/Microsoft.NetApp/netAppAccounts/MyNetAppAccount",
      "name": "MyNetAppAccount",
      "type": "Microsoft.NetApp/netAppAccounts",
      "etag": "W/\"datetime'2020-11-05T23%3A23%3A52.3729499Z'\"",
      "location": "southcentralus",
      "tags": {
        "creator": "seanluce"
      },
      "properties": {
        "provisioningState": "Succeeded",
        "activeDirectories": [
          {
            "site": "",
            "activeDirectoryId": "66666666-6666-6666-6666-666666666666",
            "username": "seanluce",
            "password": "****************",
            "domain": "seanluce.local",
            "dns": "10.199.0.5",
            "status": "Created",
            "smbServerName": "southc",
            "organizationalUnit": "CN=Computers"
          }
        ]
      }
    }
  ]
}
You’ve made it this far. Great job. Let’s create one more request with Insomnia. This time we will get the details of a specific volume in our environment.
Get Properties of a Volume 🔗
Create a new request and call it ‘Get-VolumeDetail’, verify the method is ‘GET’, and click the ‘Create’ button.
Before copying the following into the URL field, replace ‘MyNetAppAccount’, ‘MyCapacityPool’, and ‘MyVolume’ with the names of your Azure NetApp Files account, capacity pool, and volume respectively.
https://management.azure.com/subscriptions/{{subId}}/resourceGroups/{{anfRg}}/providers/Microsoft.NetApp/netAppAccounts/MyNetAppAccount/capacityPools/MyCapacityPool/volumes/MyVolume/?api-version=2020-06-01
Next, click on the ‘Auth’ tab, click it again and change it to ‘Bearer Token’, paste in your bearer token.
Once again, click that ‘Send’ button. If you have done everything correctly, you should have recieved a ‘200 OK’ response and the properties of your Azure NetApp Files volume. Here is an example:
{
  "id": "/subscriptions/44444444-4444-4444-4444-444444444444/resourceGroups/SouthC.rg/providers/Microsoft.NetApp/netAppAccounts/MyNetAppAccount/capacityPools/MyCapacityPool/volumes/MyVolume",
  "name": "MyNetAppAccount/MyCapacityPool/MyVolume",
  "type": "Microsoft.NetApp/netAppAccounts/capacityPools/volumes",
  "etag": "W/\"datetime'2020-11-03T05%3A50%3A14.8774401Z'\"",
  "location": "southcentralus",
  "tags": {
    "creator": "luces"
  },
  "properties": {
    "mountTargets": [
      {
        "provisioningState": "",
        "mountTargetId": "55555555-5555-5555-5555-555555555555",
        "fileSystemId": "55555555-5555-5555-5555-555555555555",
        "startIp": "",
        "endIp": "",
        "gateway": "",
        "netmask": "",
        "subnet": "",
        "ipAddress": "10.199.1.245",
        "smbServerFQDN": ""
      }
    ],
    "throughputMibps": 0.0,
    "provisioningState": "Succeeded",
    "fileSystemId": "55555555-5555-5555-5555-555555555555",
    "name": "MyVolume",
    "serviceLevel": "Standard",
    "creationToken": "MyVolume",
    "usageThreshold": 107374182400,
    "exportPolicy": {
      "rules": [
        {
          "ruleIndex": 1,
          "unixReadOnly": false,
          "unixReadWrite": true,
          "cifs": false,
          "nfsv3": false,
          "nfsv41": true,
          "allowedClients": "0.0.0.0/0",
          "kerberos5ReadOnly": false,
          "kerberos5ReadWrite": false,
          "kerberos5iReadOnly": false,
          "kerberos5iReadWrite": false,
          "kerberos5pReadOnly": false,
          "kerberos5pReadWrite": false,
          "hasRootAccess": true
        }
      ]
    },
    "protocolTypes": [
      "NFSv4.1"
    ],
    "baremetalTenantId": "REDACTED",
    "subnetId": "REDACTED",
    "snapshotDirectoryVisible": true,
    "kerberosEnabled": false,
    "securityStyle": "Unix"
  }
}
To learn more about The Azure NetApp Files API, head on over to docs.microsoft.com. You can completely manipulate your Azure NetApp Files resources using the API.
Come back soon for part three where I’ll show you how to use the Azure REST API to create and modify your Azure NetApp Files resources.
Bonus Content! Make an API Request Using cURL 🔗
This can be very useful if you need to include API calls in your scripts or other automation tools. Like the Insomnia method, we will need to first get our bearer token. The cURL command below is an example, but you will need to replace ‘MyAppID’, ‘MyPassword’, and ‘MyTenantID’ with you specific service principal.
curl -X POST -d 'grant_type=client_credentials&client_id=MyAppID&client_secret=MyPassword&resource=https%3A%2F%2Fmanagement.azure.com%2F' https://login.microsoftonline.com/MyTenantID/oauth2/token
The response should look something like this:
{"token_type":"Bearer","expires_in":"3599","ext_expires_in":"3599","expires_on":"1604722734","not_before":"1604718834","resource":"https://management.azure.com/","access_token":"eyJ0eXAiOiJKV1QiLCJhbGciOiJSUzI1NiIsIng1dCI6ImtnMkxZczJUMENUaklmajRydDZKSXluZW4zOCIsImtpZCI6ImtnMkxZczJUMENUaklmajRydDZKSXluZW4zOCJ9.eyJhdWQiOiJodHRwczovL21hbmFnZW1lbnQuYXp1cmUuY29tLyIsImlzcyI6Imh0dHBzOi8vc3RzLndpbmRvd3MubmV0Lzg5MGRmMmZiLWMwMjctNDBmYy04OGFkLTdkYzUzMDhkZWFjYy8iLCJpYXQiOjE2MDQ3MTg4MzQsIm5iZiI6MTYwNDcxODgzNCwiZXhwIjoxNjA0NzIyNzM0LCJhaW8iOiJFMlJnWUhBdlhiM1NOdU9BMVo4WE8vbDY3eXd4QkFBPSIsImFwcGlkIjoiNWJlZjAwZjUtYWYwYS00MTM2LTlhZTUtODA1Y2Q3ODA0ZDVjIiwiYXBwaWRhY3IiOiIxIiwiaWRwIjoiaHR0cHM6Ly9zdHMud2luZG93cy5uZXQvODkwZGYyZmItYzAyNy00MGZjLTg4YWQtN2RjNTMwOGRlYWNjLyIsIm9pZCI6ImJlNTc1OTc5LTM5NDMtNDkyZi04Y2I3LTM5YTlhYWRhMWJkMSIsInJoIjoiMC5BQUFBLV9JTmlTZkFfRUNJclgzRk1JM3F6UFVBNzFzS3J6WkJtdVdBWE5lQVRWeFJBQUEuIiwic3ViIjoiYmU1NzU5NzktMzk0My00OTJmLThjYjctMzlhOWFhZGExYmQxIiwidGlkIjoiODkwZGYyZmItYzAyNy00MGZjLTg4YWQtN2RjNTMwOGRlYWNjIiwidXRpIjoiTFhlcTdNS2R2RVNEVk1ZelZ6OGpBUSIsInZlciI6IjEuMCIsInhtc190Y2R0IjoxNTg4NjIxMjgxfQ.ZuhgTN792Ii465-9VFXojAilo5xsJ_BAxSwE3N51Zl5FKDIvS1qLkd9NrH2HM53t27gHJInB1WRrxBaFKkC2Eqzck2V9JDj2GWQpJ-rQlC8VS9rAg9JWBstk4-i-btsIxS4aVbhjQyP3aKy0aNf4EGOeSsVJ28Pes5LlMESeZdSP9VDJfwmL-hu3D0Hyk88KgjCXPVoJN5WKnR2Y1QhH0VGbdUF3QHhQF3InNUQowHtaSt2PCbEB0dcXBsVLBeFuZ-ss3q_swlXEBJCSgY_1UGltjCn26L-hVRWIBOTn4tS_3gEqKvI3AtNOlbrKsqyg418LvhoynaYvk3QaKlPOzg"}
Now that we have recieved our bearer token via cURL, let’s make another REST API call to get a list of snapshots for a specific Azure NetApp Files volume:
curl -X GET -H "Authorization: Bearer eyJ0eXAiOiJKV1QiLCJhbGciOiJSUzI1NiIsIng1dCI6ImtnMkxZczJUMENUaklmajRydDZKSXluZW4zOCIsImtpZCI6ImtnMkxZczJUMENUaklmajRydDZKSXluZW4zOCJ9.eyJhdWQiOiJodHRwczovL21hbmFnZW1lbnQuYXp1cmUuY29tLyIsImlzcyI6Imh0dHBzOi8vc3RzLndpbmRvd3MubmV0Lzg5MGRmMmZiLWMwMjctNDBmYy04OGFkLTdkYzUzMDhkZWFjYy8iLCJpYXQiOjE2MDQ3MTg4MzQsIm5iZiI6MTYwNDcxODgzNCwiZXhwIjoxNjA0NzIyNzM0LCJhaW8iOiJFMlJnWUhBdlhiM1NOdU9BMVo4WE8vbDY3eXd4QkFBPSIsImFwcGlkIjoiNWJlZjAwZjUtYWYwYS00MTM2LTlhZTUtODA1Y2Q3ODA0ZDVjIiwiYXBwaWRhY3IiOiIxIiwiaWRwIjoiaHR0cHM6Ly9zdHMud2luZG93cy5uZXQvODkwZGYyZmItYzAyNy00MGZjLTg4YWQtN2RjNTMwOGRlYWNjLyIsIm9pZCI6ImJlNTc1OTc5LTM5NDMtNDkyZi04Y2I3LTM5YTlhYWRhMWJkMSIsInJoIjoiMC5BQUFBLV9JTmlTZkFfRUNJclgzRk1JM3F6UFVBNzFzS3J6WkJtdVdBWE5lQVRWeFJBQUEuIiwic3ViIjoiYmU1NzU5NzktMzk0My00OTJmLThjYjctMzlhOWFhZGExYmQxIiwidGlkIjoiODkwZGYyZmItYzAyNy00MGZjLTg4YWQtN2RjNTMwOGRlYWNjIiwidXRpIjoiTFhlcTdNS2R2RVNEVk1ZelZ6OGpBUSIsInZlciI6IjEuMCIsInhtc190Y2R0IjoxNTg4NjIxMjgxfQ.ZuhgTN792Ii465-9VFXojAilo5xsJ_BAxSwE3N51Zl5FKDIvS1qLkd9NrH2HM53t27gHJInB1WRrxBaFKkC2Eqzck2V9JDj2GWQpJ-rQlC8VS9rAg9JWBstk4-i-btsIxS4aVbhjQyP3aKy0aNf4EGOeSsVJ28Pes5LlMESeZdSP9VDJfwmL-hu3D0Hyk88KgjCXPVoJN5WKnR2Y1QhH0VGbdUF3QHhQF3InNUQowHtaSt2PCbEB0dcXBsVLBeFuZ-ss3q_swlXEBJCSgY_1UGltjCn26L-hVRWIBOTn4tS_3gEqKvI3AtNOlbrKsqyg418LvhoynaYvk3QaKlPOzg" -H "Content-Type: application/json" https://management.azure.com/subscriptions/44444444-4444-4444-4444-444444444444/resourceGroups/SouthC.rg/providers/Microsoft.NetApp/netAppAccounts/MyNetAppAccount/capacityPools/MyCapacityPool/volumes/MyVolume/snapshots/?api-version=2020-06-01
The response should look something like this:
{"value":[{"id":"/subscriptions/44444444-4444-4444-4444-444444444444/resourceGroups/SouthC.rg/providers/Microsoft.NetApp/netAppAccounts/MyNetAppAccount/capacityPools/MyNetAppAccount/volumes/MyVolume/snapshots/MyFirstSnapshot","name":"MyNetAppAccount/MyNetAppAccount/MyVolume/MyFirstSnapshot","type":"Microsoft.NetApp/netAppAccounts/capacityPools/volumes/snapshots","location":"southcentralus","properties":{"provisioningState":"Succeeded","snapshotId":"55555555-5555-5555-5555-555555555555","fileSystemId":"55555555-5555-5555-5555-555555555555","name":"MyFirstSnapshot","created":"2020-11-07T03:24:57Z"}},{"id":"/subscriptions/44444444-4444-4444-4444-444444444444/resourceGroups/SouthC.rg/providers/Microsoft.NetApp/netAppAccounts/MyNetAppAccount/capacityPools/MyNetAppAccount/volumes/MyVolume/snapshots/MySecondSnapshot","name":"MyNetAppAccount/MyNetAppAccount/MyVolume/MySecondSnapshot","type":"Microsoft.NetApp/netAppAccounts/capacityPools/volumes/snapshots","location":"southcentralus","properties":{"provisioningState":"Succeeded","snapshotId":"55555555-5555-5555-5555-555555555555","fileSystemId":"55555555-5555-5555-5555-555555555555","name":"MySecondSnapshot","created":"2020-11-07T03:25:10Z"}}]}